RelayThat Review: Can Bloggers Make More Money Easily?
Before I officially begin my RelayThat review, I want to tell you a bit about my history with blogging and writing. For years, I have been involved in many different aspects of this site–from writing to creating social media to graphic design!
In the first few years, our small team had to painstakingly create every post, every picture, and every logo or icon that appeared on the site and on social media posts by hand. And let me tell you, that took up a lot of time that we could have been using to optimize the site!
In this RelayThat review, you will know all that you need to know.
Not Quite Right…
As technology has continued to develop, the Blogging Money Life team has tried a few different ways to save time when it comes to creating professional graphics.
Throughout our search, we’ve tried Adobe Photoshop and Canva, and although both of those programs are good tools, it still was not what we were looking for when it came to using the perfect graphic design tools for our specific needs.
Finding RelayThat
We never gave up on our search for the perfect tool that would benefit us the best, and we finally found it. RelayThat is an excellent tool for bloggers, especially for beginners who don’t have a lot of design skills and eventually want to make money from your blog?
RelayThat lifetime deal is also an attractive deal for you to purchase. This site makes it easy to create images for multiple platforms, such as Facebook, Pinterest, Instagram, etc., while also being an excellent tool for designing personalized cards, flyers, and ads, all at once!
I was shocked at how easy it was to create on the RelayThat site, and I am sure you will be too!
A Brief Tour of the Site
Now the question is, what is RelayThat? The site is easy to navigate and very intuitive. I am not very tech-savvy, but I could quickly figure out the site and create my first social media images within 15 minutes (and that is only because I couldn’t decide on the right picture to use!).
When you first log into your RelayThat account, you are greeted at the top of your page! You can then get to work creating your images!
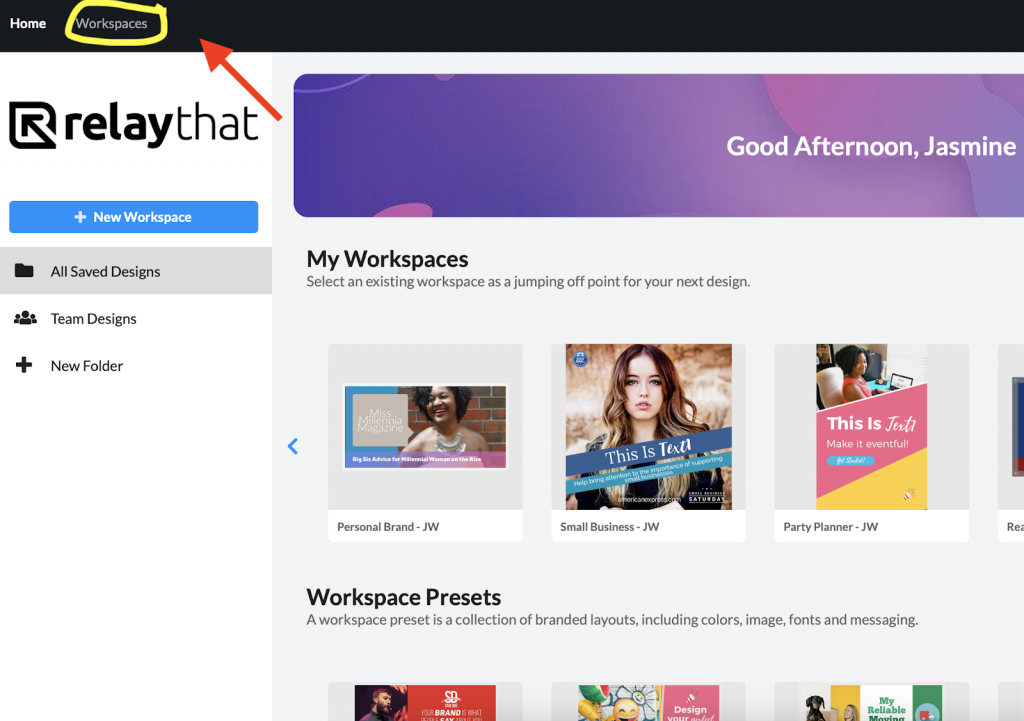
At the top left of the homepage, you will see “Workspace.” This is where you will go to get started.
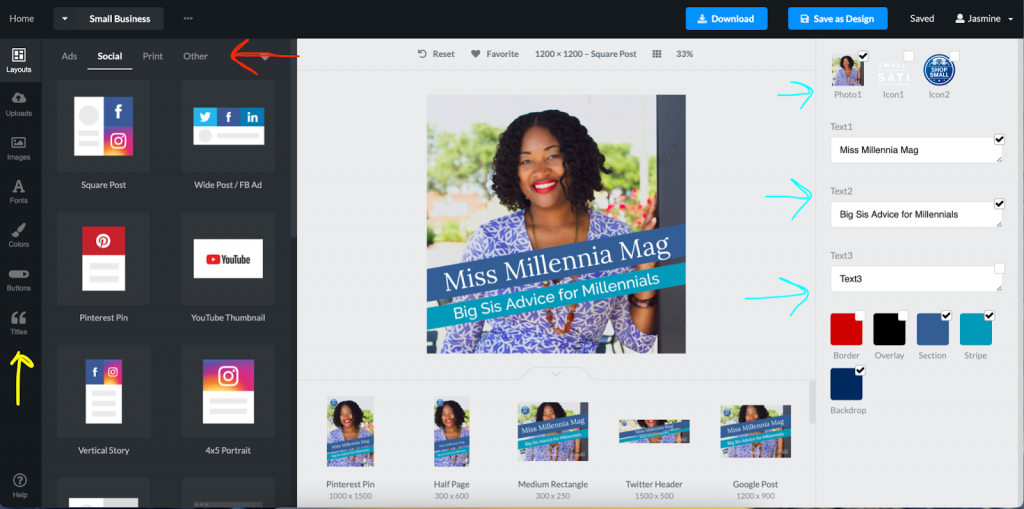
The yellow arrow points to the different ways you can customize your images. The red arrow points to different categories of layouts you can choose from. I usually find myself using the social tab.
However, there are layouts specific to ads, prints (such as personal cards or flyers), and others. The blue arrows point to how you add stock photos or brand images, image fonts (and font colors and size), and then your chosen color scheme.
What Sets RelayThat Apart?
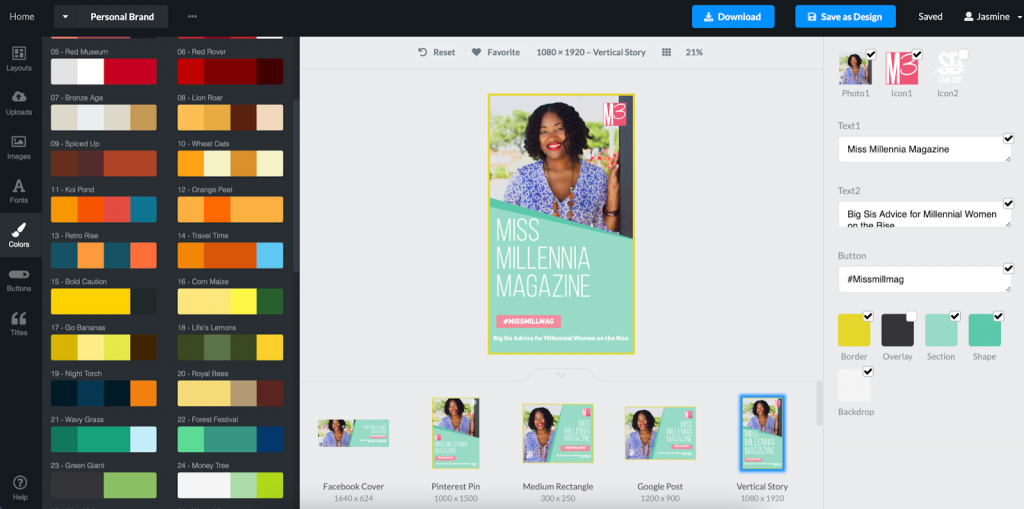
Having the ability to create more than one social media post at once was a dream come true! If you notice the orange arrows near the bottom of the picture, these images are automatically formatted while I create the primary graphic.
Each image is slightly different in layout and size, but the font, colors, and pictures are the same. For example, the principal picture I created is within this article, but the fourth small image, named “square post,” would be perfect for my Instagram story!
My Overall Opinion of RelayThat
If you made it this far into this RelayThat review article, I am sure you realize that I am over the moon about this game-changing website. But I also bet that you are thinking to yourself, “Is RelayThat good for making images for social media and ads for my blog content?”.
The short answer is, of course, it is! Otherwise, I would not feel comfortable writing an entire article about it! With that being said, nothing is ever perfect, so let me break it down into a pros and cons list about RelayThat.
Pros of Using RelayThat
The Magic Import Tool

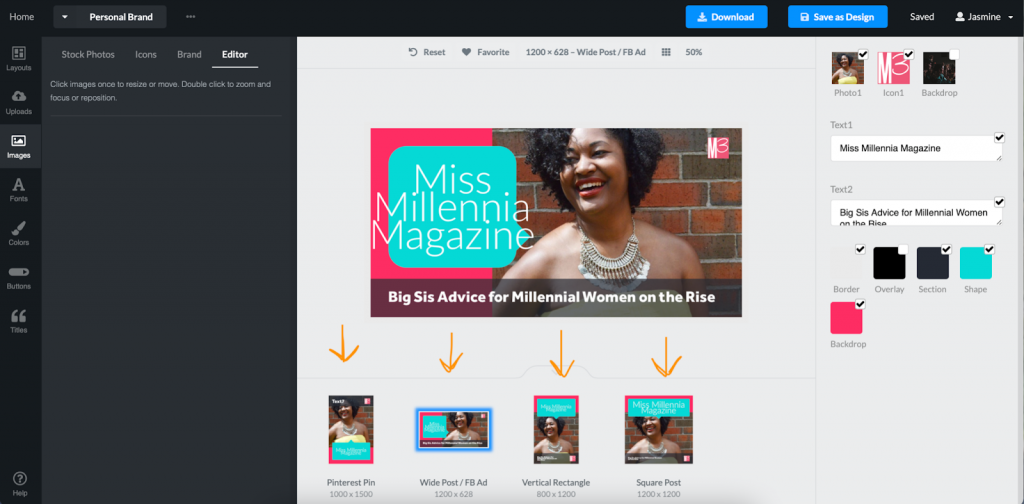
RelayThat has a nifty tool called the Magic Import, and it makes creating images even faster and easier. Earlier, I mentioned that I was having difficulty choosing a color scheme for a photo. With this tool, I had to go to the site where I wanted to create the image.
Then, I selected the upload button. I was given options for colors, images, and icons! From there, I added them to my vision. The colors are the exact shades from the Miss Millennia website!
A Lot of Room for Creativity
If you are brand new to the blogging business and developing blog posts, RelayThat allows you to be as creative as you like when it comes to colors, text, layout, etc. Even if you are not that creative, RelayThat also has color schemes for you to choose from! And don’t let the image fool you; there is a lot more!
RelayThat vs. Canva
As mentioned before, Canva is a great tool. But it does not compare to the many things that RelayThat does better. One difference that stands out is the ability to create multiple social media posts at once.
Canva does have the ability to create specific images for different platforms. However, you would have to make each one individually. Even with the paid version of the site, that ability is not offered.
Cons of Using RelayThat
Is RelayThat Free?
No, it is not free, but nothing in life worth having ever is free! No one is ever ready to shell out any amount of money, especially when you are just starting out a new blog.
However, I view RelayThat as a NECESSITY for any blogger! The prices can be seen below. Click here to see all the details for pricing when it comes RelayThat.

The less time you spend creating images, the more time you have to write, edit, and post! Running a business takes a lot of time and effort, and with RelayThat, you get so much time back that the price is worth it in the end.
RelayThat is the perfect tool for any business owner, blogger, vlogger– or whatever your passion is! With this site, you can save time, money, and effort when it comes to creating your own royalty-free images. Now, you will be able to attract a whole new audience to your blog without doing anything extra! Try RelayThat out, and let me know in the comments what you think about this RelayThat review!
