8 Cool ConvertKit Hacks You Should Know About

Are you using Convertkit and are looking for a few Convertkit Hacks to improve your blogging business? If the answer is yes, I am giving you my top tips on using Convertkit as intended – to help creators like you grow your business.
You can use many tips and strategies for email marketing to grow your business. For example, I use ConvertKit for my email marketing software and have used it for the last four years.
And in that time, I have learned quite a few ConvertKit hacks that make it easier for bloggers to grow and make money with their email lists. And I’m going to share those tips with you today.
A Quick ConvertKit Review
If you’re wondering how I landed on ConvertKit as my email marketing tool of choice, I have to tell you it was not a straight shot. When I started my blog in 2011, ConvertKit did not exist yet. (Nathan Barry founded ConvertKit in 2013) I started my email marketing journey the way many people start with MailChimp.
Then I realized that once you get a certain number of email subscribers, it’s time to move to a more geared platform towards your niche. For example, MailChimp is fine for small business owners of e-commerce stores. However, I wanted to do many other things with my email list outside of just sending essential email marketing campaigns that MailChimp did not provide.
Moving On…
I went to Aweber from MailChimp, an excellent and moderately priced email marketing service. I also enjoy that they thought about teaching their users more about email marketing with videos, which was a pretty big deal at the time. That was great because I still had much to learn about this space.
I started using their more advanced features but soon realized I could not implement the newer strategies I was learning about on the Aweber platform. As a result, they began to fall behind on what was up and coming in the email marketing world.

During this time, I heard about a new email marketing platform designed specifically for bloggers. When I found ConvertKit, I was smitten. Not only did it have all the tools I needed, such as automation, email sequences, customizable forms, automation rules, and split testing, but Convertkit helped creators with a ton of content that could help them grow their email lists. They even do regular webinars to teach people more about how to have successful email campaigns and ways to build your email list.
I signed up and have not regretted a thing. Convertkit’s prices are reasonable, I have various email marketing tools I can use within their platform, and they’re always looking for and working on the next best thing.
If you don’t believe me, give it a try for yourself. Their free plan allows you to have up to 1,000 subscribers on your account for free. You can use my link to sign up for a free trial account here!
Today I am still thrilled with my ConvertKit account. Sure, there are comparable ones, but ConvertKit was made especially for professional bloggers like me. And I love them for that.
I am always surprised when I learn that some bloggers are not using some of the most powerful features that ConvertKit offers, and I want to spend a little time sharing some of those things with you.
1. Create various email sequences
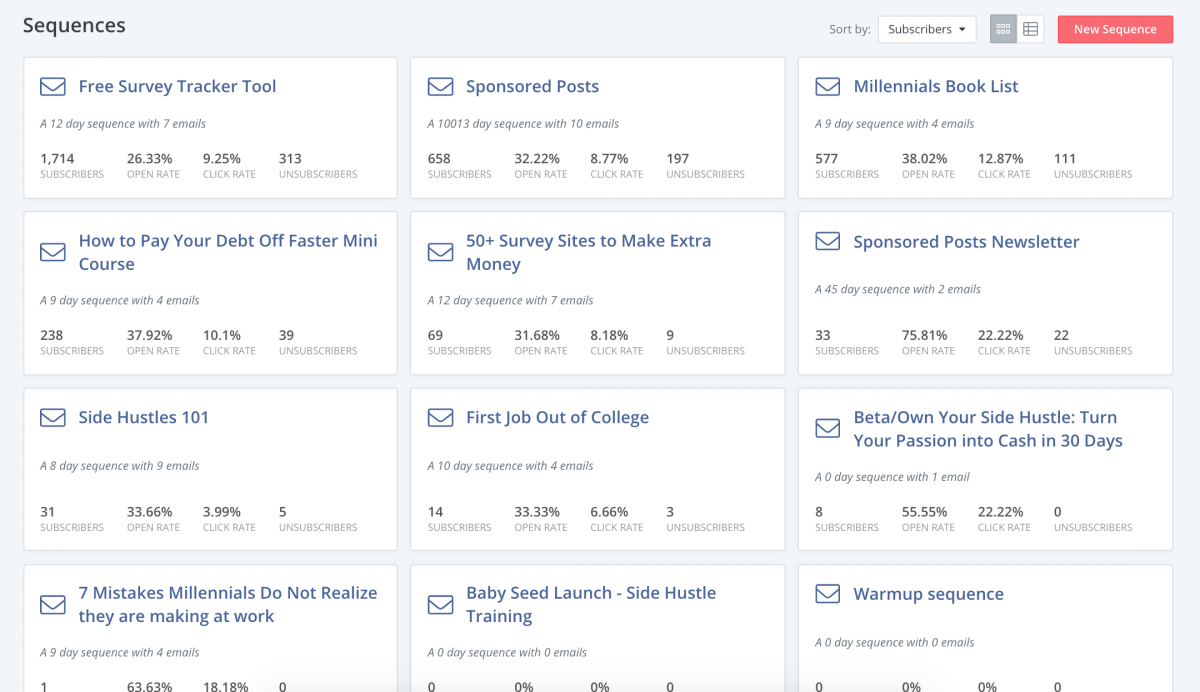
If you have an email list, you should have at least an onboarding email sequence. And with ConvertKit, you can have MANY types of email sequences. What makes an email sequence different than sending a broadcast email is that an email sequence is a series of emails that go out to your email list automatically. This is all included in the email automation process, which you can easily handle with ConvertKit.
I typically link a particular form to a specific email sequence to show the subscriber who gets a special freebie goes through an email sequence related to that freebie. Take one of our freebies, for example—my free book list for millennials.
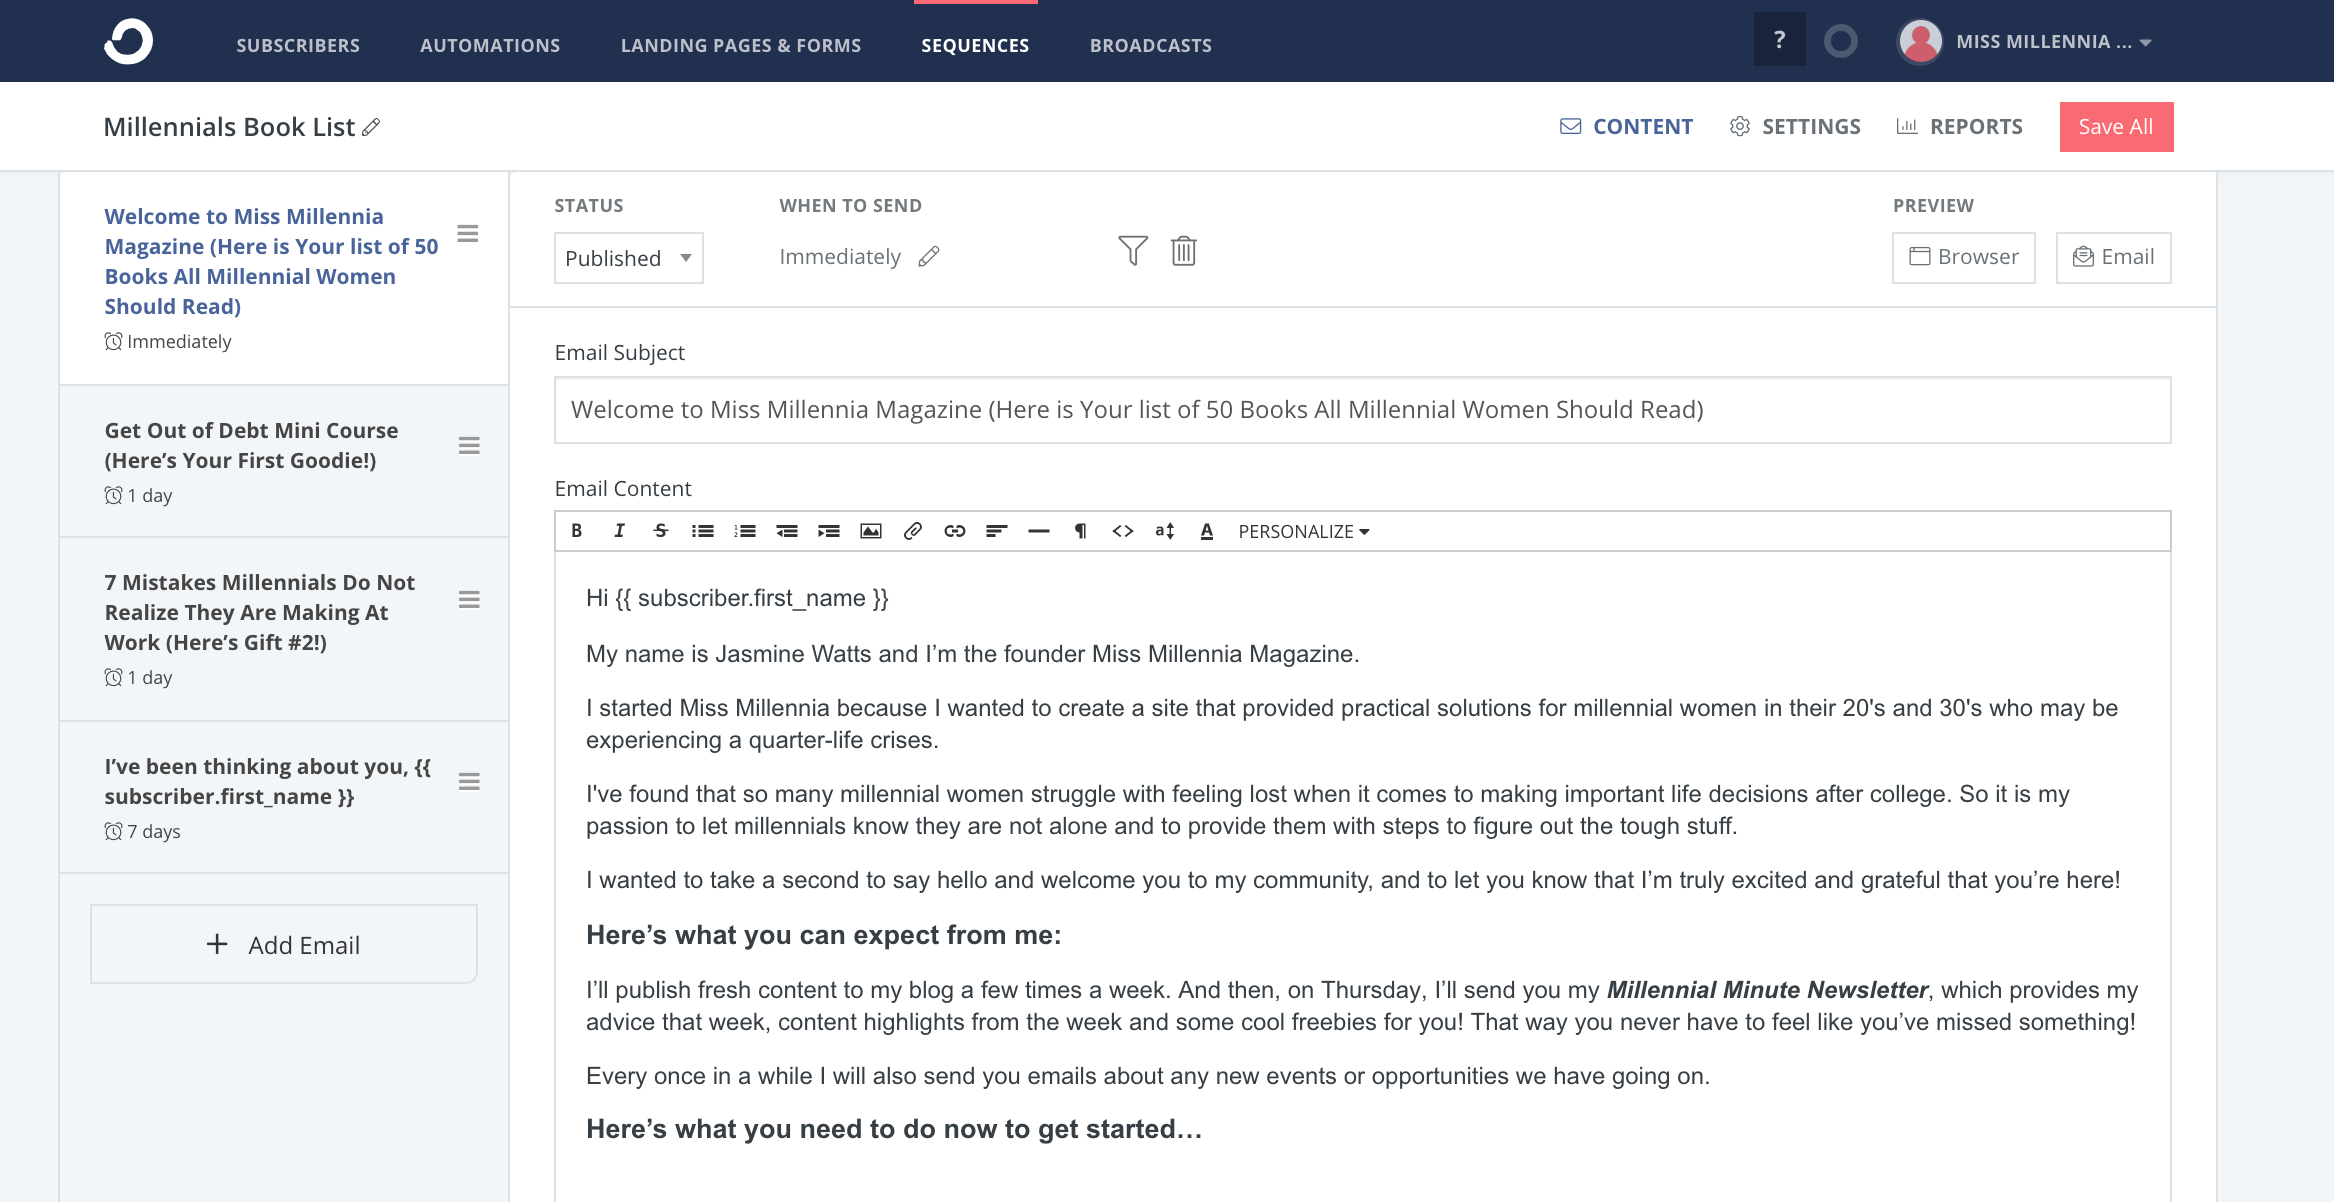
I set up my sequence so that anyone who signed up for this review will automatically be put into my “millennials book list” line. That means they will automatically get a series of emails related to that freebie. Easy enough! This way, I can ensure they get quality content geared toward what they signed up for.
It’s effortless to set this up and ConvertKit. Are you have to do is click on the “Sequences” tab on the top navigation menu. Then, click the pink “New Sequence” button on the far right.
You can create emails and set times when you want them sent to your new subscriber. It’s a great way to welcome your readers and introduce them to yourself and your content.
2. Use the visual automation area to map out your sales funnel
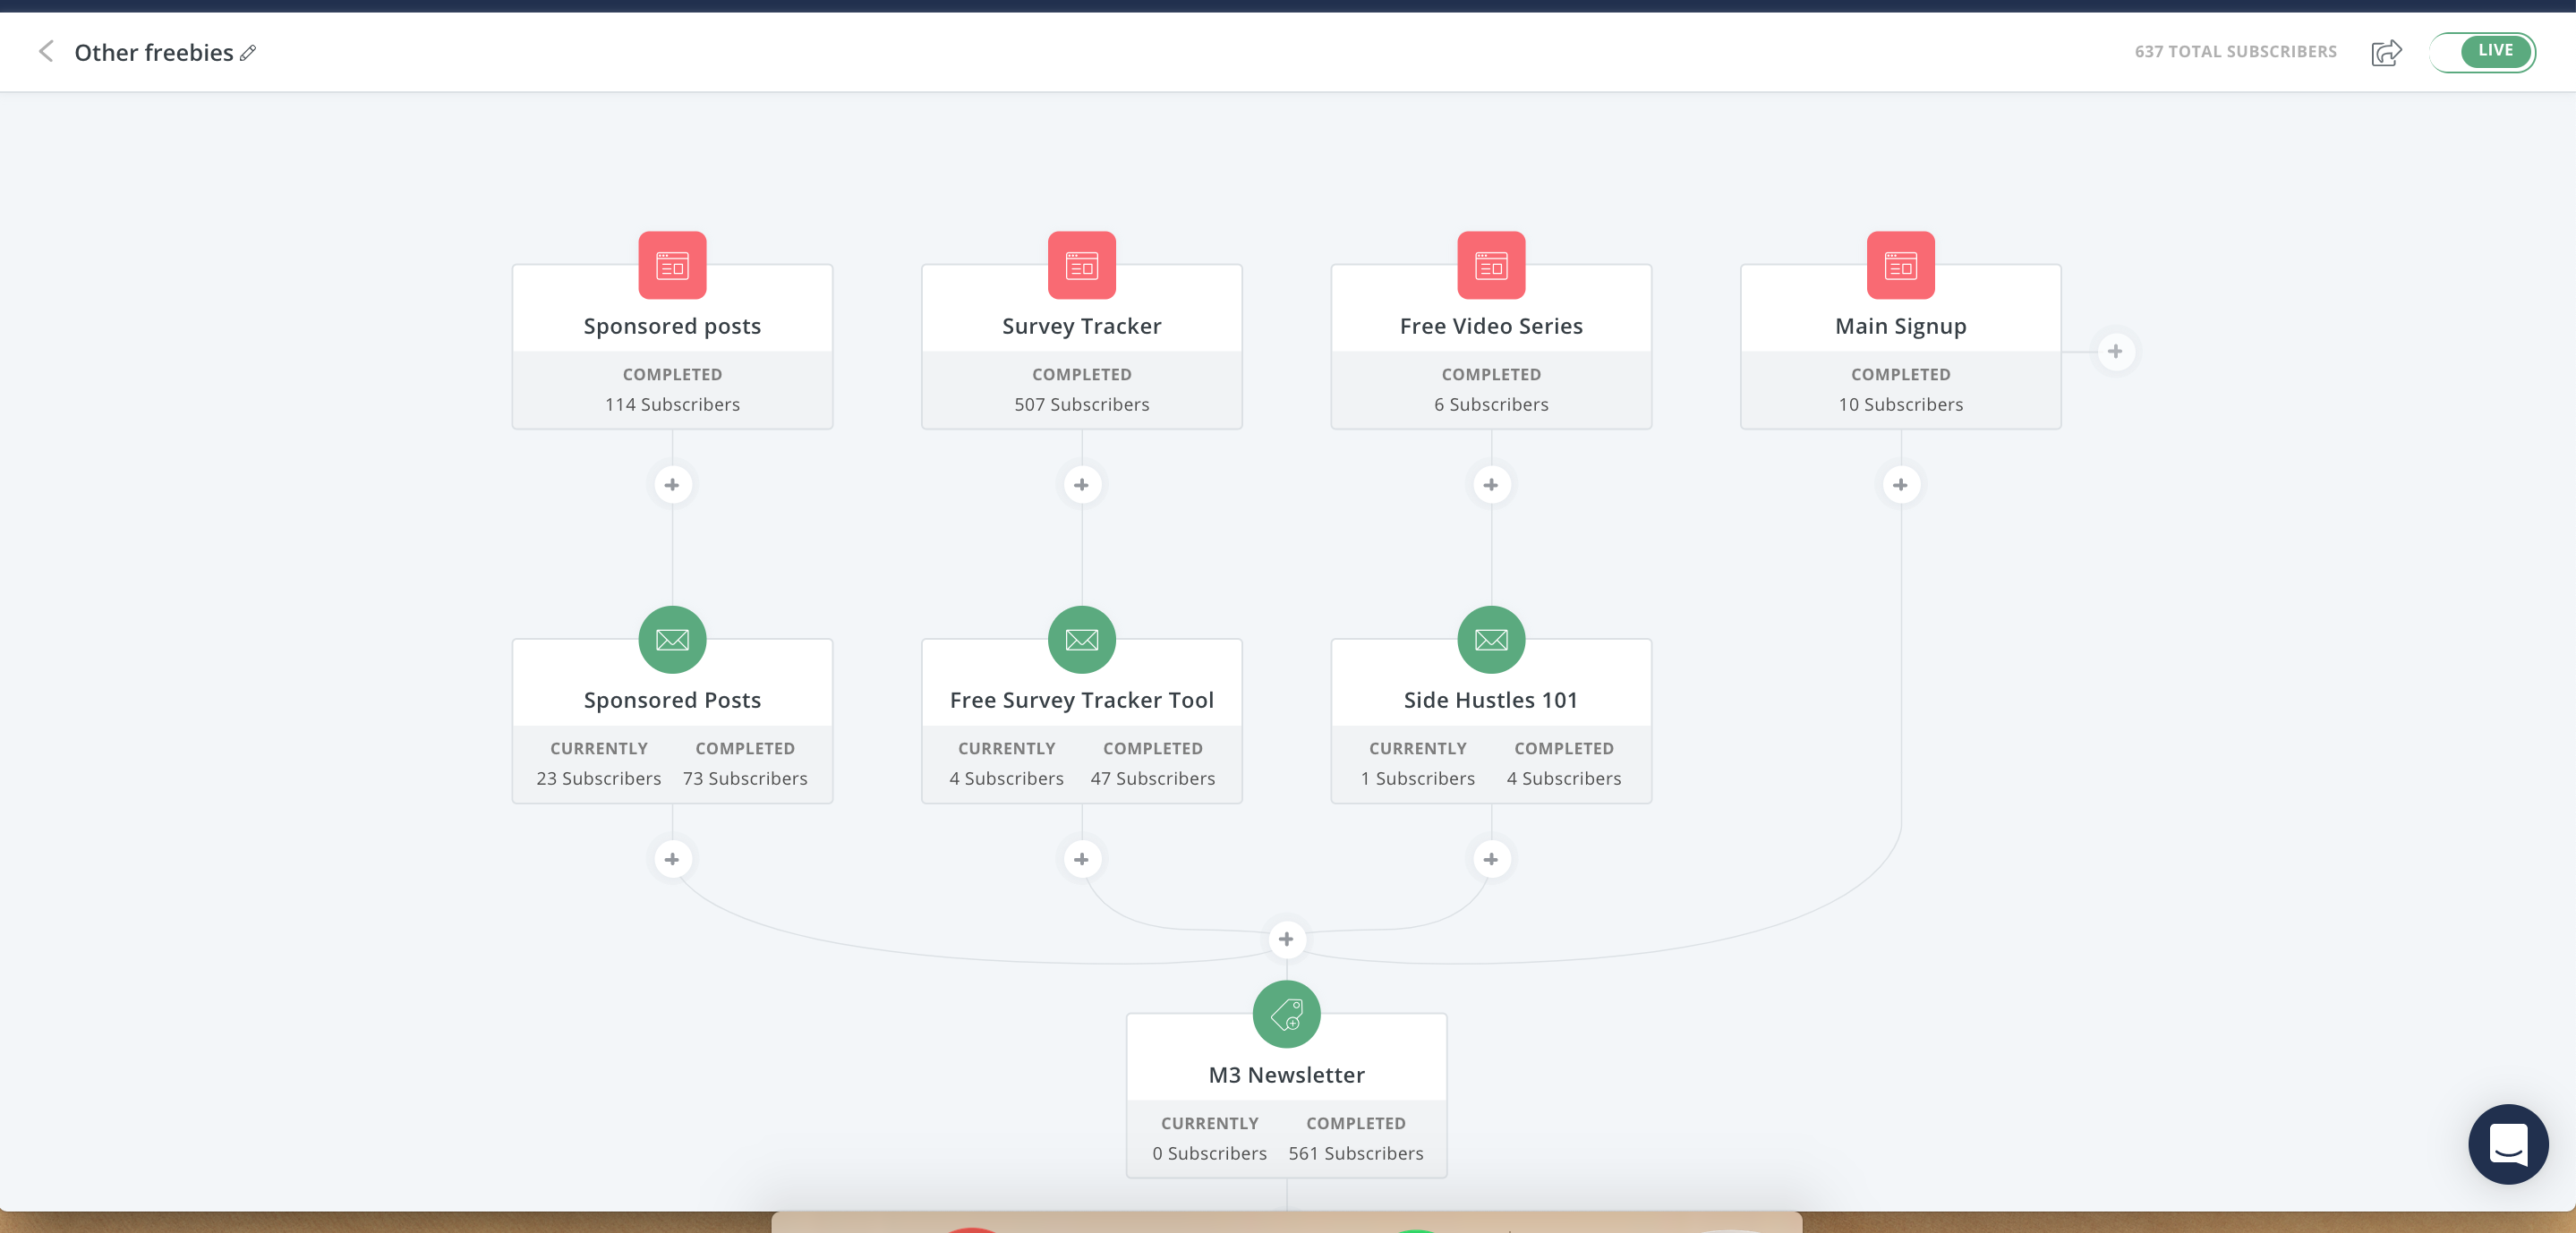
The visible automation portion of ConvertKit is a newer, incredible feature. Marketing automation makes it much easier to visualize your audience member coming through to sales. For example, my ConvertKit account is linked to my Stripe account, so anyone who purchases one of my products is also added to ConvertKit. There, they are automatically labeled as a product purchaser.
It is excellent to segment your list this way because someone who buys one thing from you, especially if you have great content or product, is more likely to buy again. Use this to your advantage when it comes to sending emails. It would help if you did not treat those who purchase versus those who abandon the cart or, worst, don’t even open an email. They both need different things, so give them what they need.
To set this up, you want to go to “Automations” and then hit the “Integrations” section. From here, you can set up whatever payment provider you use for your products there. Make sure that when they purchase a product, they are automatically put into ConvertKit so that you can continue to email them.
3. Use their customer support live chat when you are in a jam
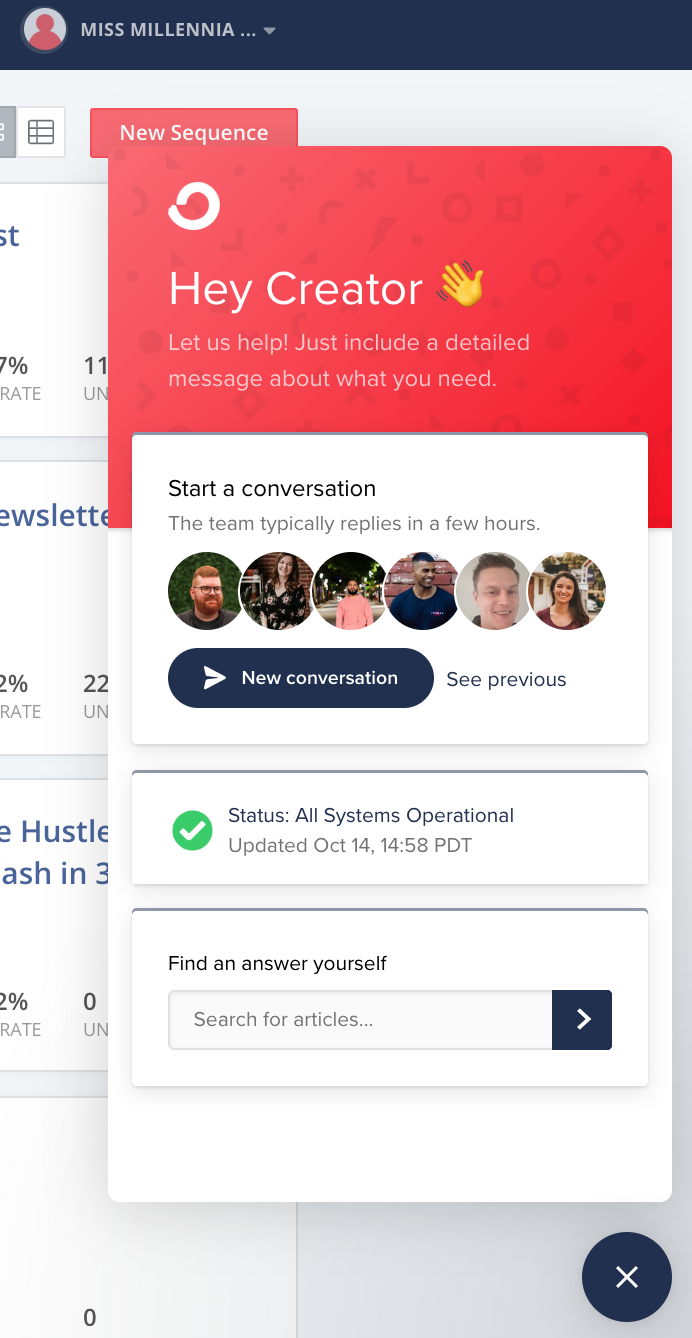
ConvertKit’s customer service is one of the new features that moved me to switch to their email platform. It is so lovely that they have an online chat feature, allowing me to message you anytime and get a response within a day.
If you’re in a jam with anything—and I mean anything—with your email, the ConvertKit team is fantastic. It doesn’t matter if you want them to look over an email for you or if you cannot figure out how to accomplish a specific goal; they are there for you.
Convertkit’s customer service team is patient and knows the platform and strategies well. Their team will answer your questions in a way that solves the problem you are facing and teaches you something new about the platform you did not realize before. Use them!
But That’s Not All
While we’re on the ConvertKit team’s subject, I should also mention that they always have some excellent webinars and different events to help subscribers grow their email lists and get better email writing. Moreover, it also offers a ConvertKit hacks tutorial to help you learn effective email marketing strategies.
4. Embed lead magnets in your blog posts
If you have several freebies on your blog, you want to ensure they are everywhere on your site. The more your posts are seen, the more read signups you can expect to get.
It is super easy to embed forms on your site with ConvertKit. While most people put conditions on their sidebars and web page home, they often neglect to set records on their blog posts. So, for example, I made sure that this form is embedded in every blog post on my website with my free millennials book list.
5. Create a landing page
I was a little late to the game regarding landing pages on ConvertKit, but their landing page templates mean you can collect an email address without even having a website. Many people know how important it is to have opt-in forms landing pages for your freebies on your homepage and sidebars but not in the blog posts.
Having landing pages where people can sign up for your product or service or weekly newsletter is handy. Especially if you share your email lead magnets in places outside your website, such as social media.
And the landing pages on Convertkit could not be any easier to build. The video below shows you how to use their free landing page designs for your freebie and how to embed it on your site.
For the record, having a landing page and a signup form makes a considerable difference. If you are going to get people to sign up on your email list from Pinterest, for example, you do not want to send people to a sign up form on your site where there are probably 1000 other places for them to click and get distracted.
Sending them to a landing page is great because there are fewer distractions. They get to the heart of the matter, which is signing up for your list. Long story short, the landing page builder is awesome.
6. Split-test your subject lines
The Convertkit a/b testing feature is one of my favorite things about this tool. If you have ever experienced sending an email and getting hardly anyone opening it, you know the struggle of coming up with the right subject lines.
Split testing your subject line when sending broadcast emails helps you learn more about your audience and improve open rates. If you are not getting people to open your emails, it’s because the subject line sucks. #SorryNotSorry
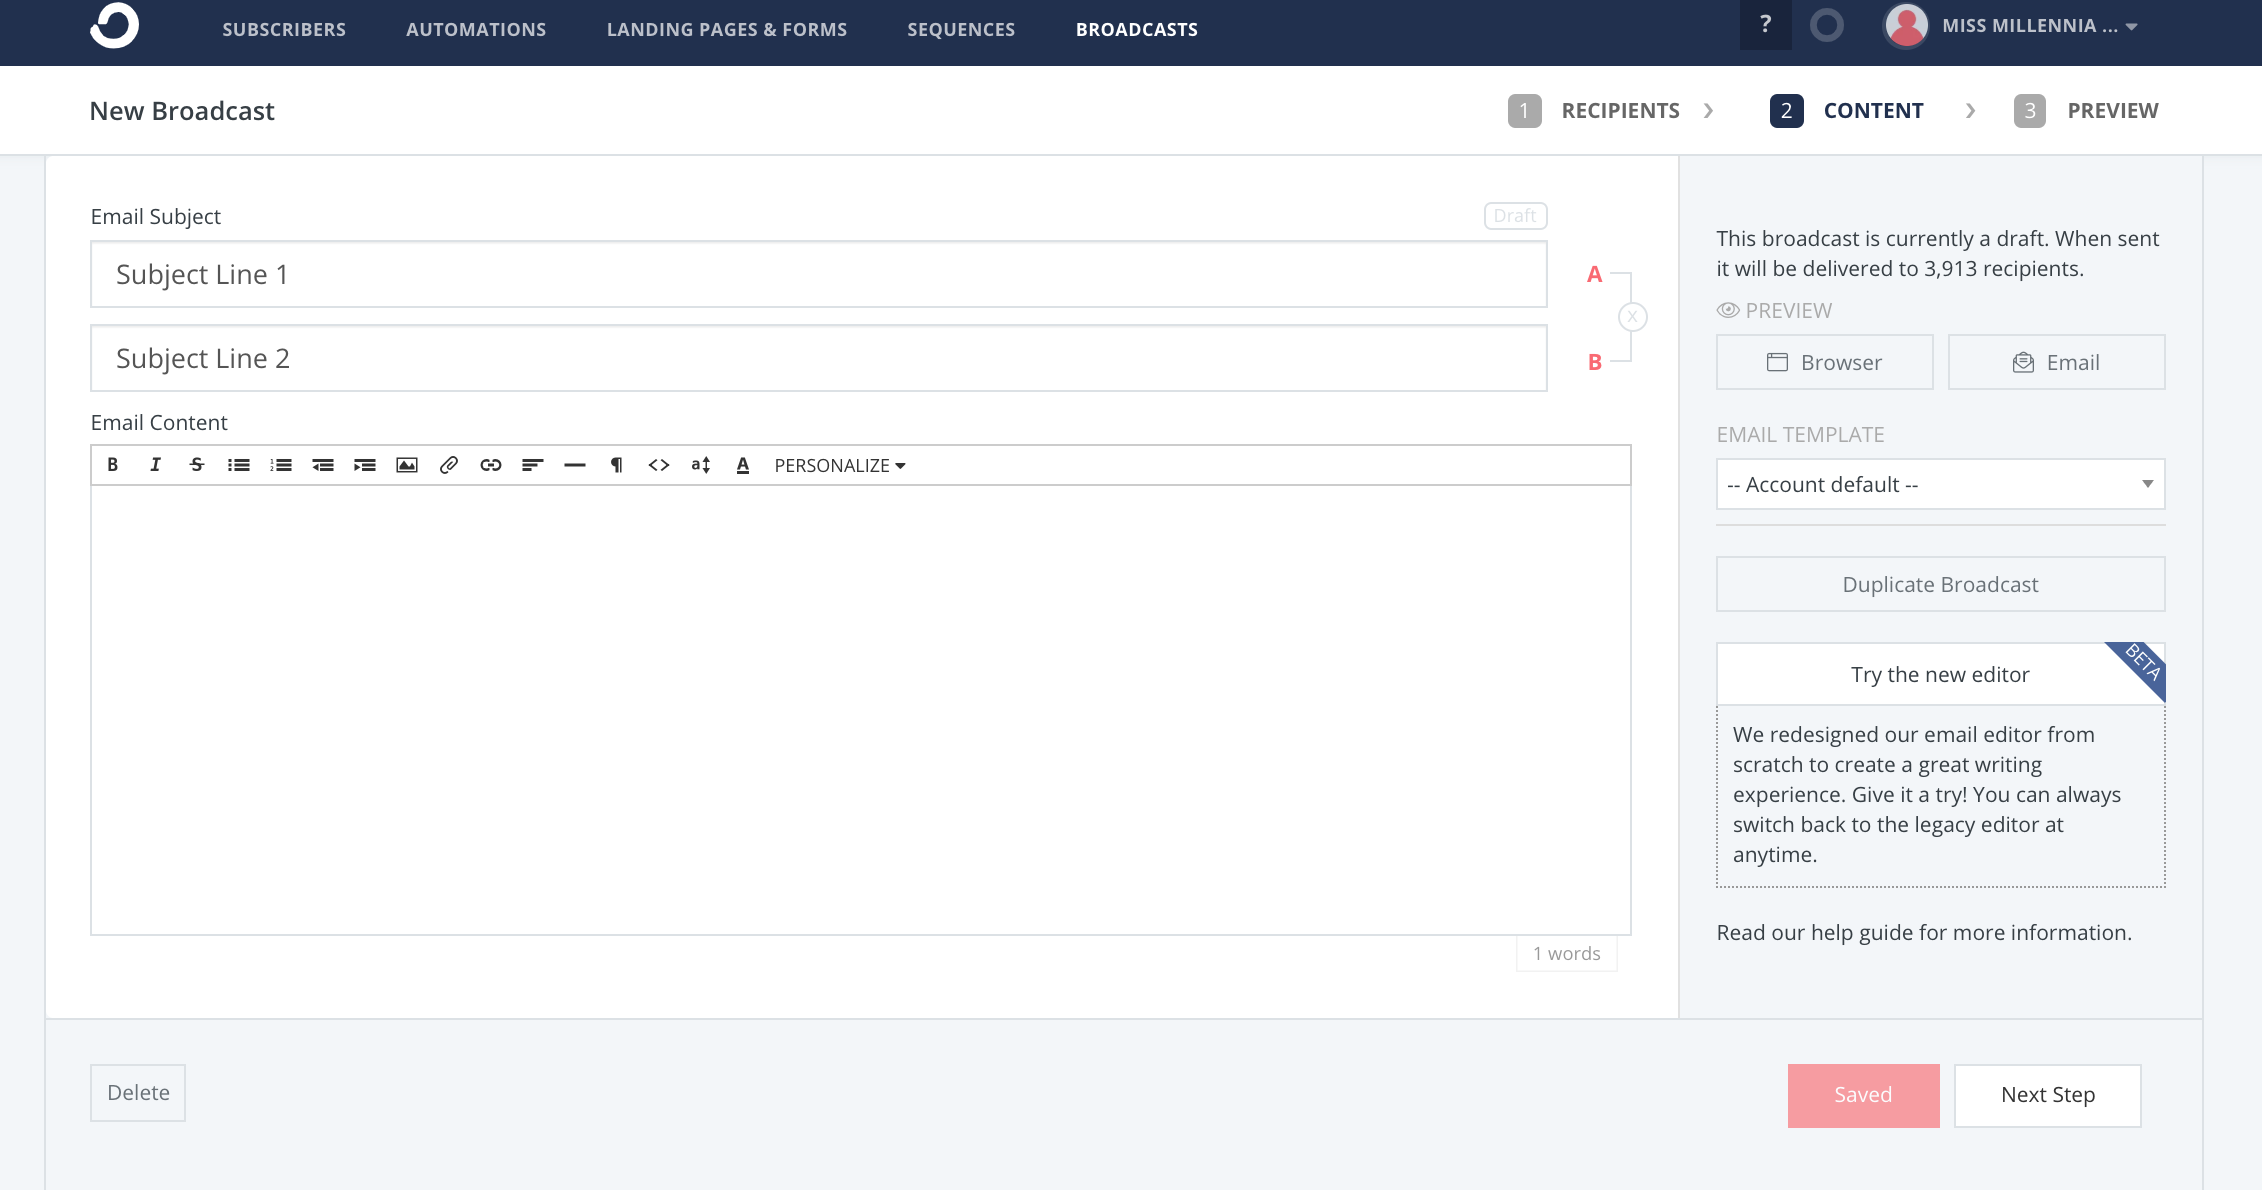
Here is how it works. First, ConvertKit sends out both subject lines 50/50 to 30% of your audience. Then, when it sends, it measures subject line is getting more open.
After four hours, it sends the winning subject line to the remaining 70% of your email list. Pretty cool, right? This way, you know you are getting the best subject line every time. Using the a/b testing feature makes it easier to build strong subject lines.
7. Use Other Free Tools to Get The Highest Conversion Rates
Well, ConvertKit is incredible with all its features and the best option for email marketing campaigns. But I’d be amiss if I didn’t mention all the right tools that make your ConvertKIn addition, the experience is even better. Here are some of my favorites.
Pretty Links
Let me tell you about Pretty Links. Pretty Links allows you to take any link and make it beautiful. For example, you take a link like this: https://wp-techsupport.com/?ref=157 and turn it into this: https://missmillmag.com/wp-tech-support.
So what does that have to do with the email? Good question! Another benefit of Pretty Links is that I can track all of my call-to-action (CTA) button links in one place.
I go to my reporting to see how many clicks I get for each call to action button I create. (Bonus Tip: I mainly use this for my affiliate links!)
Drip Scripts
Remember when I said you could have several Convertkit onboarding emails? If you don’t have one, tools like DripScripts allow you to have email templates to start with. I admit that my welcome email sequence differs entirely from their model. But as you all may know, starting writing when you already have some words on paper is much easier than starting from scratch.
DripScrips is another free tool. You can get the templates here.
Subject Line Analyzer tool
It would help if you had this tool. It tells you if you have a good subject line score based on data that says what people are more likely to open.
The best part about this tool is that it’s free! Get a score of 60 or more, and you are ready to send emails to the main list. You can use it here.
8. Click to tag
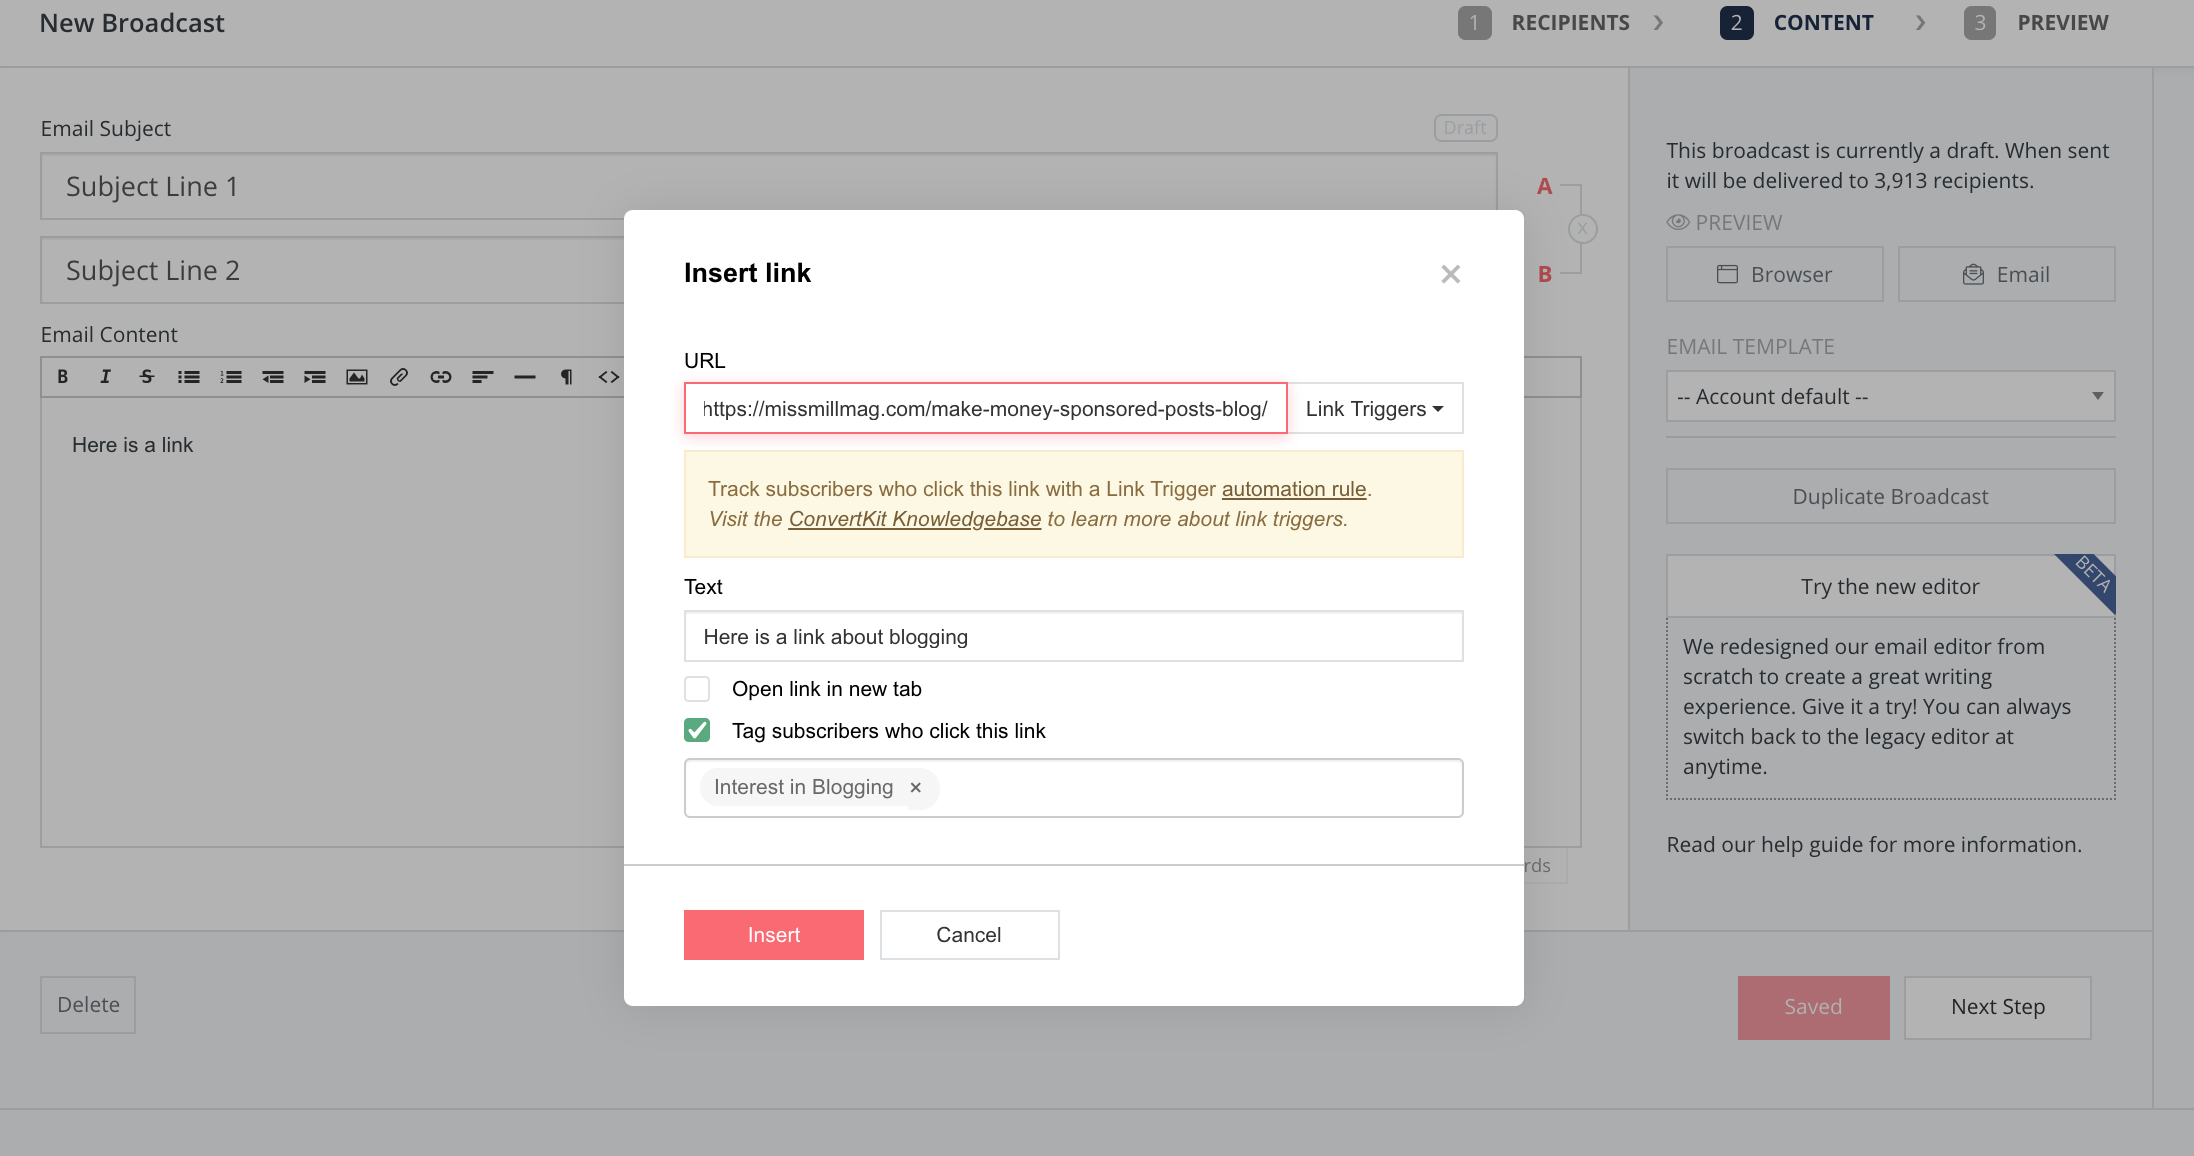
Another ConvertKit hack you should be aware of is the click-to-tag feature. ConvertKit tags and segments your list with every email you send. Here is what it does.
I have five different links in my email, and one of those links is to a post about blogging. I often set it up to say that anyone who clicks on the link is interested in blogging. You can do this with every email you send from ConvertKit, which is fantastic because it makes it easier for you to segment your list.
A segmented list is so much easier to sell products because you know to whom you’re selling. Another benefit of having a segmented list? You will get launched more often for different products without tiring your list. More money, anyone?
Bonus Tip: Wake up your audience
OK, seriously, this is the last step before I’m finished.
I recently discovered that tracking features let you see people who have opened an email in the last three months. Why is this important? Because if you haven’t noticed, ConvertKit gets more expensive the more subscribers you have on your list.
And this is all fine and dandy if potential subscribers on your list are opening your emails. But if you have people sitting on your list and not opening anything, they are costing you money and not doing you any favors. So you have to find a way to give them the boot and cut the additional cost.
Set Rules!
Set a rule in your ConvertKit that says if a subscriber has not opened an email in 30 days, they are removed from the email list. This sequence helps keep your email list clean, so you know if someone is on your list, they are active and ready to buy.
If you’re unsure how to reach a sequenced target, they have a great one on DripScripts called Cold email engagement. This sequence tries to reengage them before removing them from the list altogether. This sequence would help keep your email clean so that you know the people on your list or active and ready to buy.
Want to learn more tips ConvertKit hacks and email marketing hacks? Check out this webinar: List Building Pep Talk. Your Guide to your first 1,000 email subscribers.
Those are the ConvertKit hacks I have for you today, but tell me if I’m missing something. Also, tell me your tip, and I will be happy to add more to my list!
Convertkit now has a free plan that is free of charge for your first 1000 subscribers! You can sign up for the Free program here. Watch the video below to get an idea of what the free plan includes and how to get started with it today!



I am using Mailchimp for my blog. However, they have some limitations on their free plan and even in the paid plans, they lack some features. I am looking for an alternative. I have heard a lot about Converkit and will definitely give it a try. Thanks for sharing this helpful post.